
Oprah Magazine
Photo Director: Christina Weber
Design Director: Jill Armus
Photo Editor: Scott Lacey
Photographer: Hugh Kretschmer
How long have you been working with the magazine; tell us about your collaboration.
I have been working with Oprah Magazine since the magazine’s inception back in 2000, and in every case it was always a very inclusive and collaborative process. This project was no different. All parties on the magazine’s team, Photo Director, Christina Weber, Design Director, Jill Armus, and Photo Editor, Scott Lacey, contributed to the cause both in time and insight, from start to finish. The process started with a “party-line” conference call with all members online brainstorming ideas back and forth for a good hour or so. It was great! This is one of my favorite parts of the process where we bring everyone’s imagination and sensibilities to the table, and “daydream” together.
What type of direction did you get from the team? And, do you always sketch out ideas?
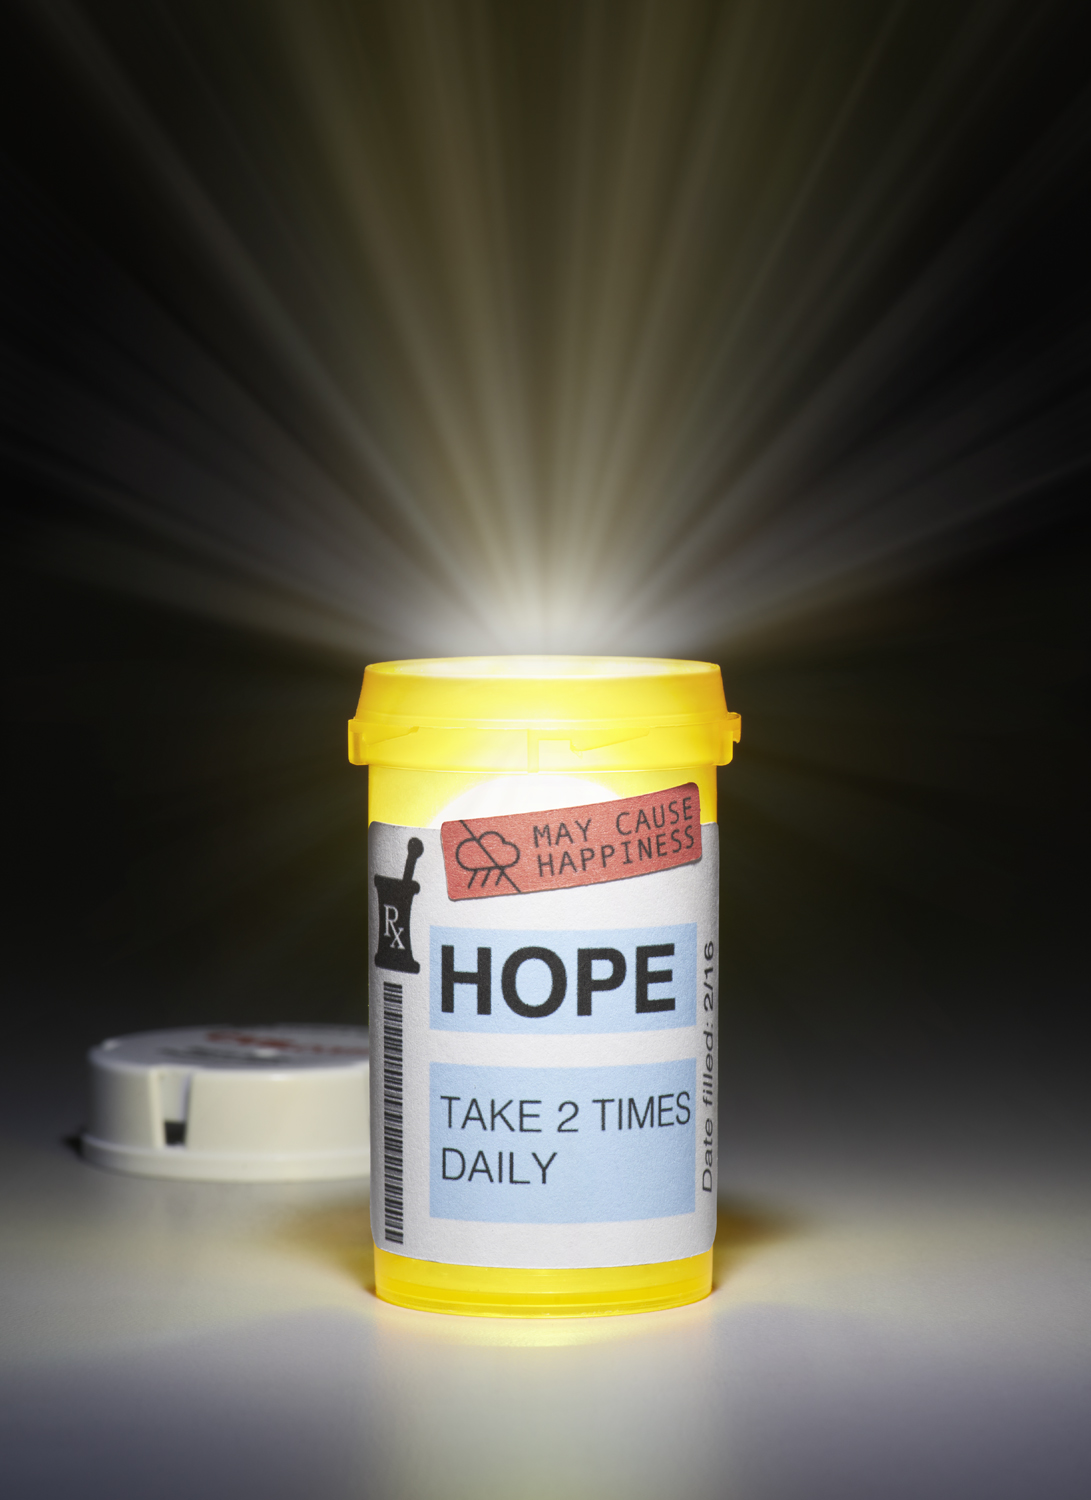
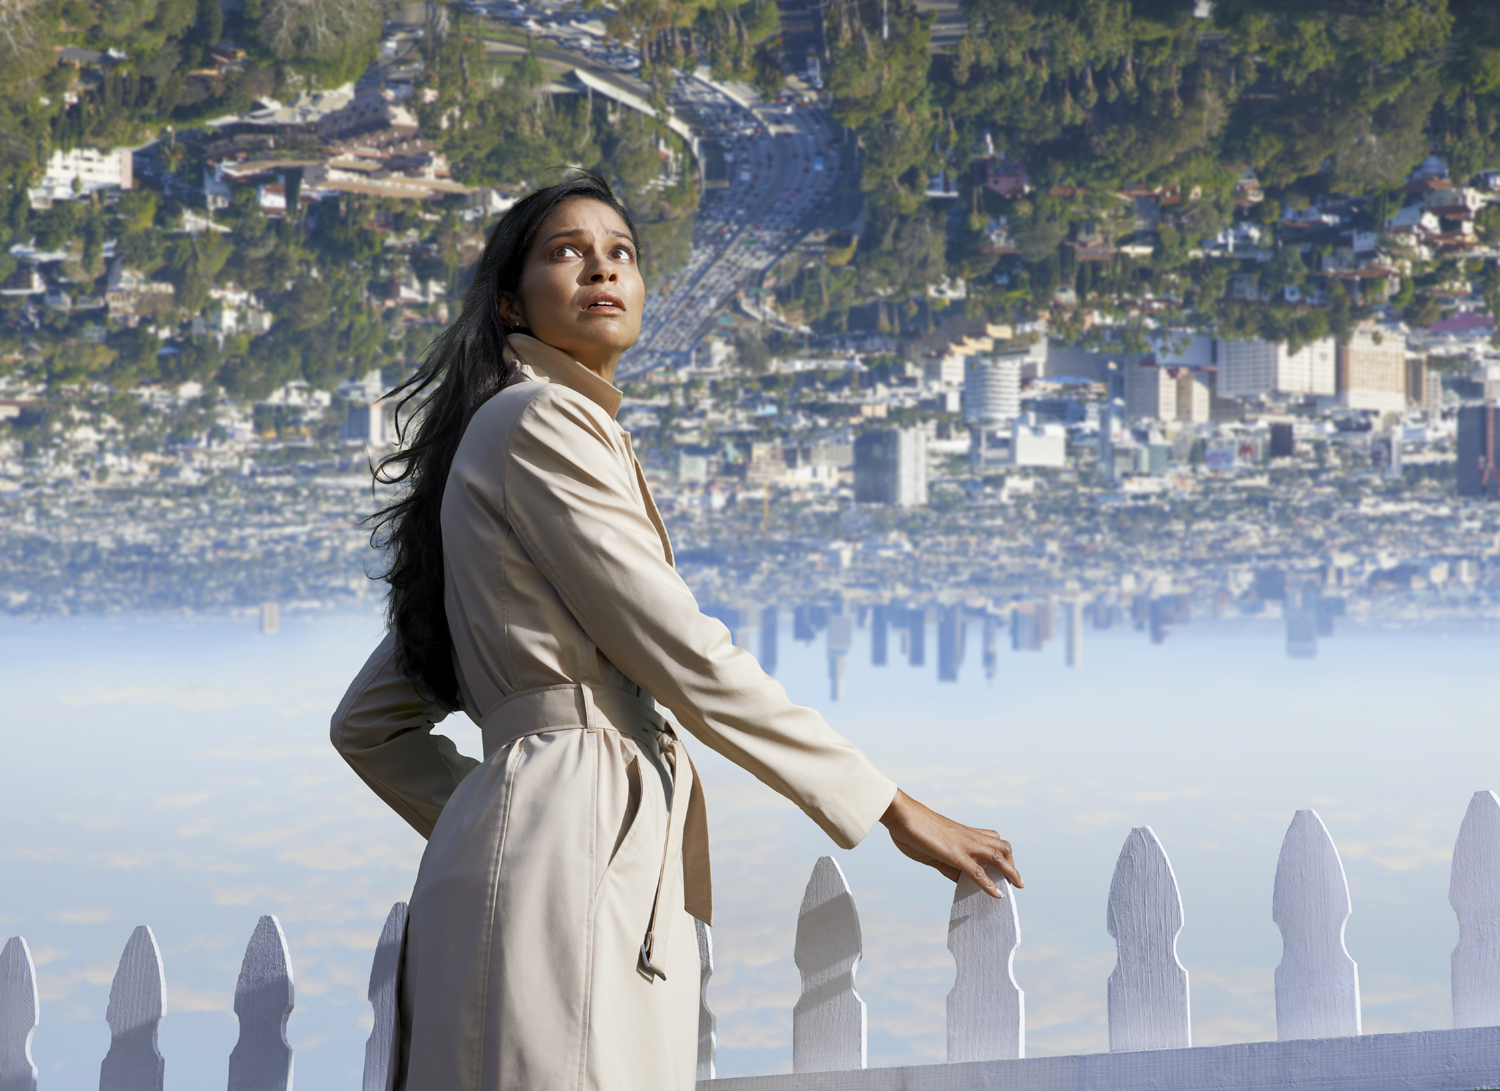
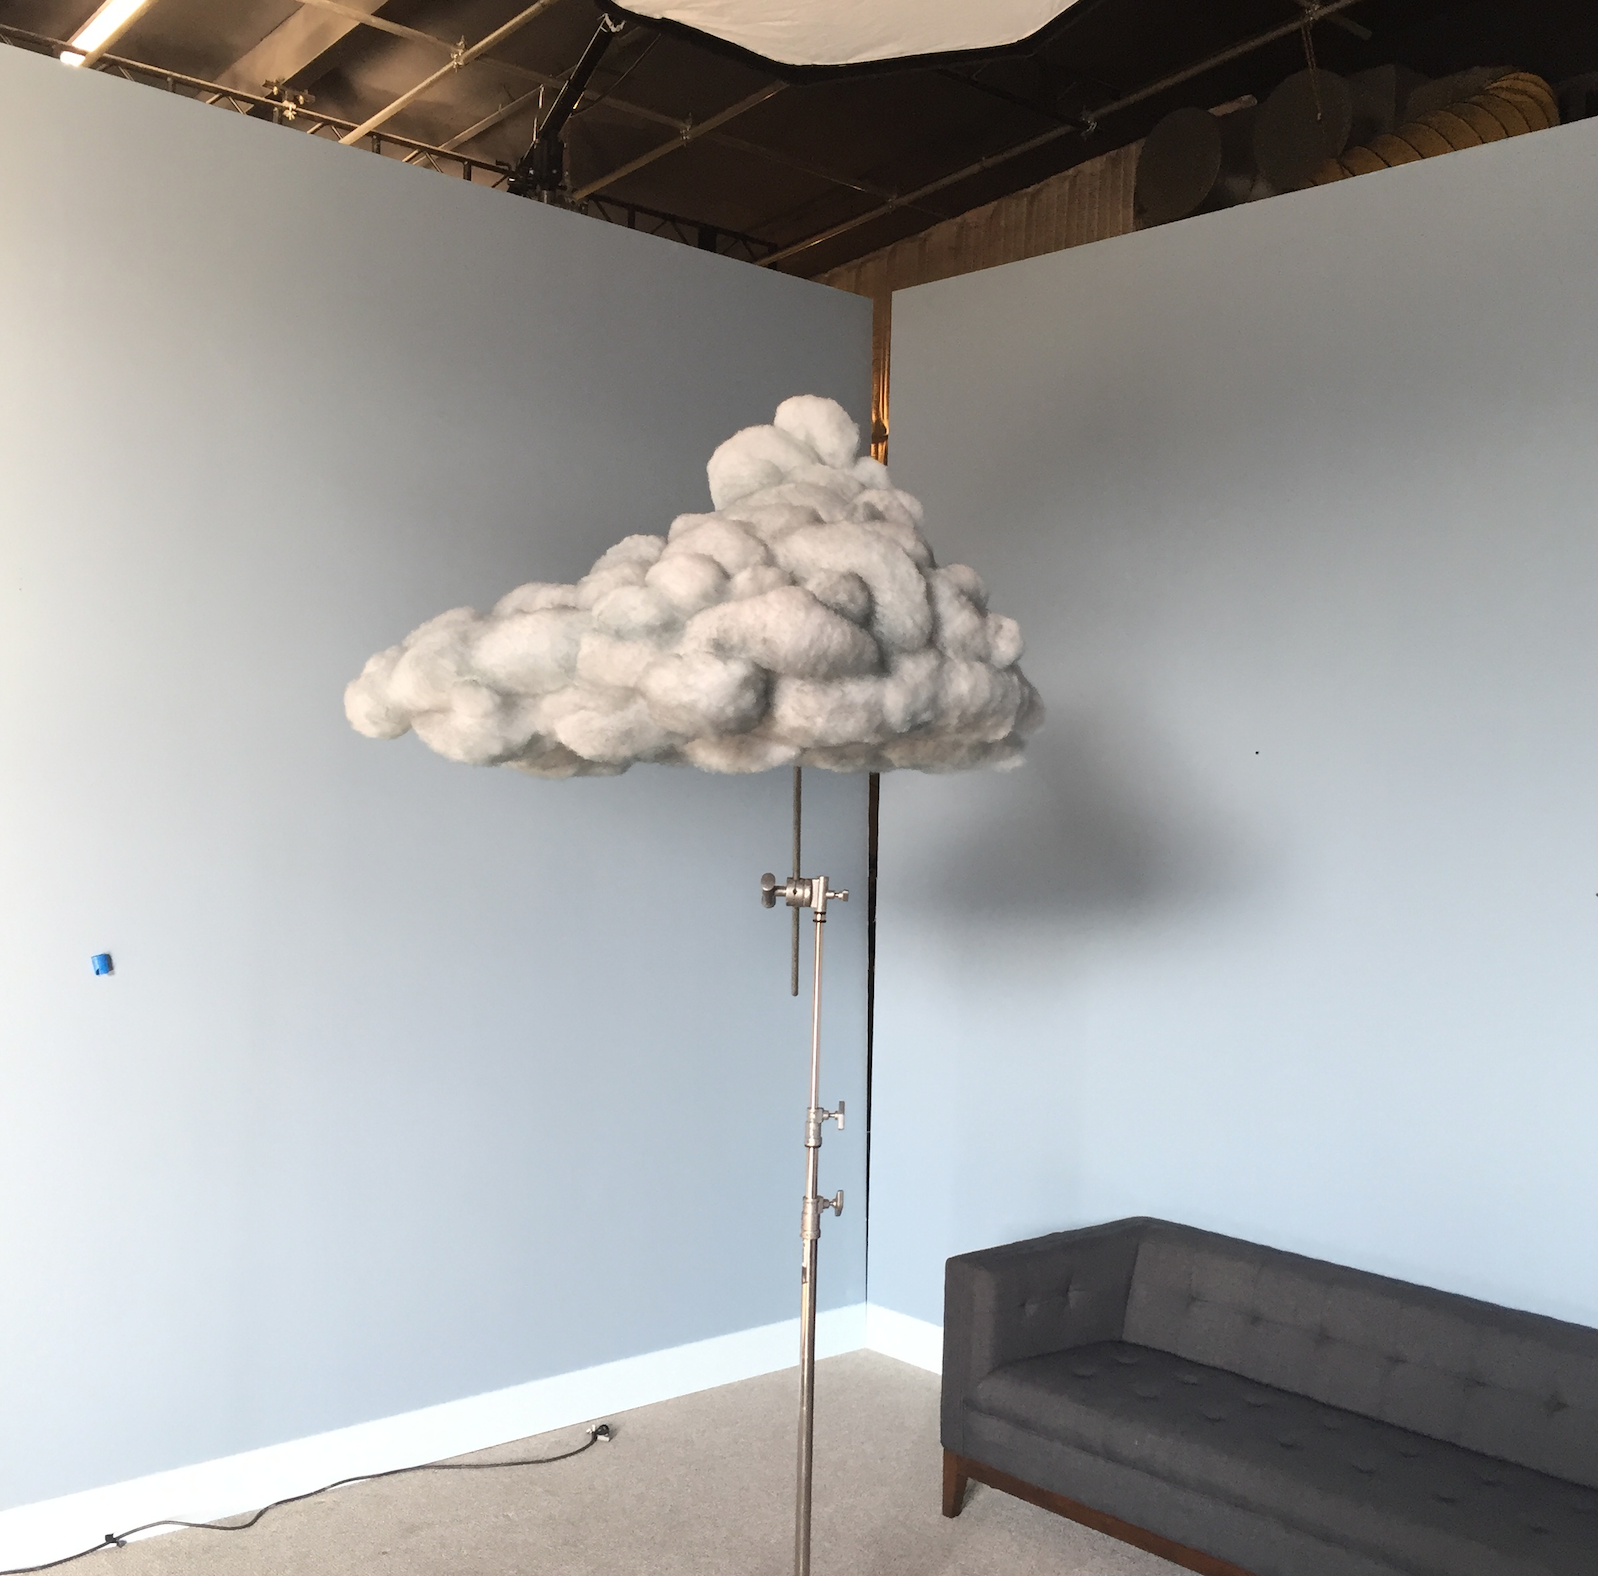
Primarily they wanted the visuals to connote a sense of hope, and we strived to inject a positive subtext. So, in just about every image there is an element that contrasts with the remaining ensemble; i.e., a ray of sunshine, the word “Hope”, having the model looking up rather than down, etc. Once the sketches were approved after a few rounds, we talked about details, coloring, set design, and how some of the specialty props would be constructed. All in all, pre-production took about two weeks, which was fine by me because every detail needed to be looked at and designed into the respective visual, and that is how I typically work. We discussed things like costume design and color to marry well with the particular set. Belabored the written “prescription” on the pill bottle, and how the rays of light needed to be in a golden hue. How the dark cloud was to be designed and how it’s own color needed to match the blue of the room.
Sketches are vital in that process and I have learned not to proceed unless it is sketched out, it simply makes my job much easier. They provide, not only a blueprint for me to work from, but I can gauge size relationships, preview juxtapositions, and overall design and compositions. It segues between a vision in my head and the final photograph. The sketch is also a vital element to communicate my ideas to the art director and something I can get signed off on before production. In some cases, the designer might take my sketch and drop it into the layout, and we can all see how it fits and predict any pitfalls we may encounter during shooting. I am all about pre-production and I make sure I have enough time in the front of a project to make sure the post-production is minimized as much as possible. The sketch helps with that objective in so many ways.
What was the biggest challenge for project?
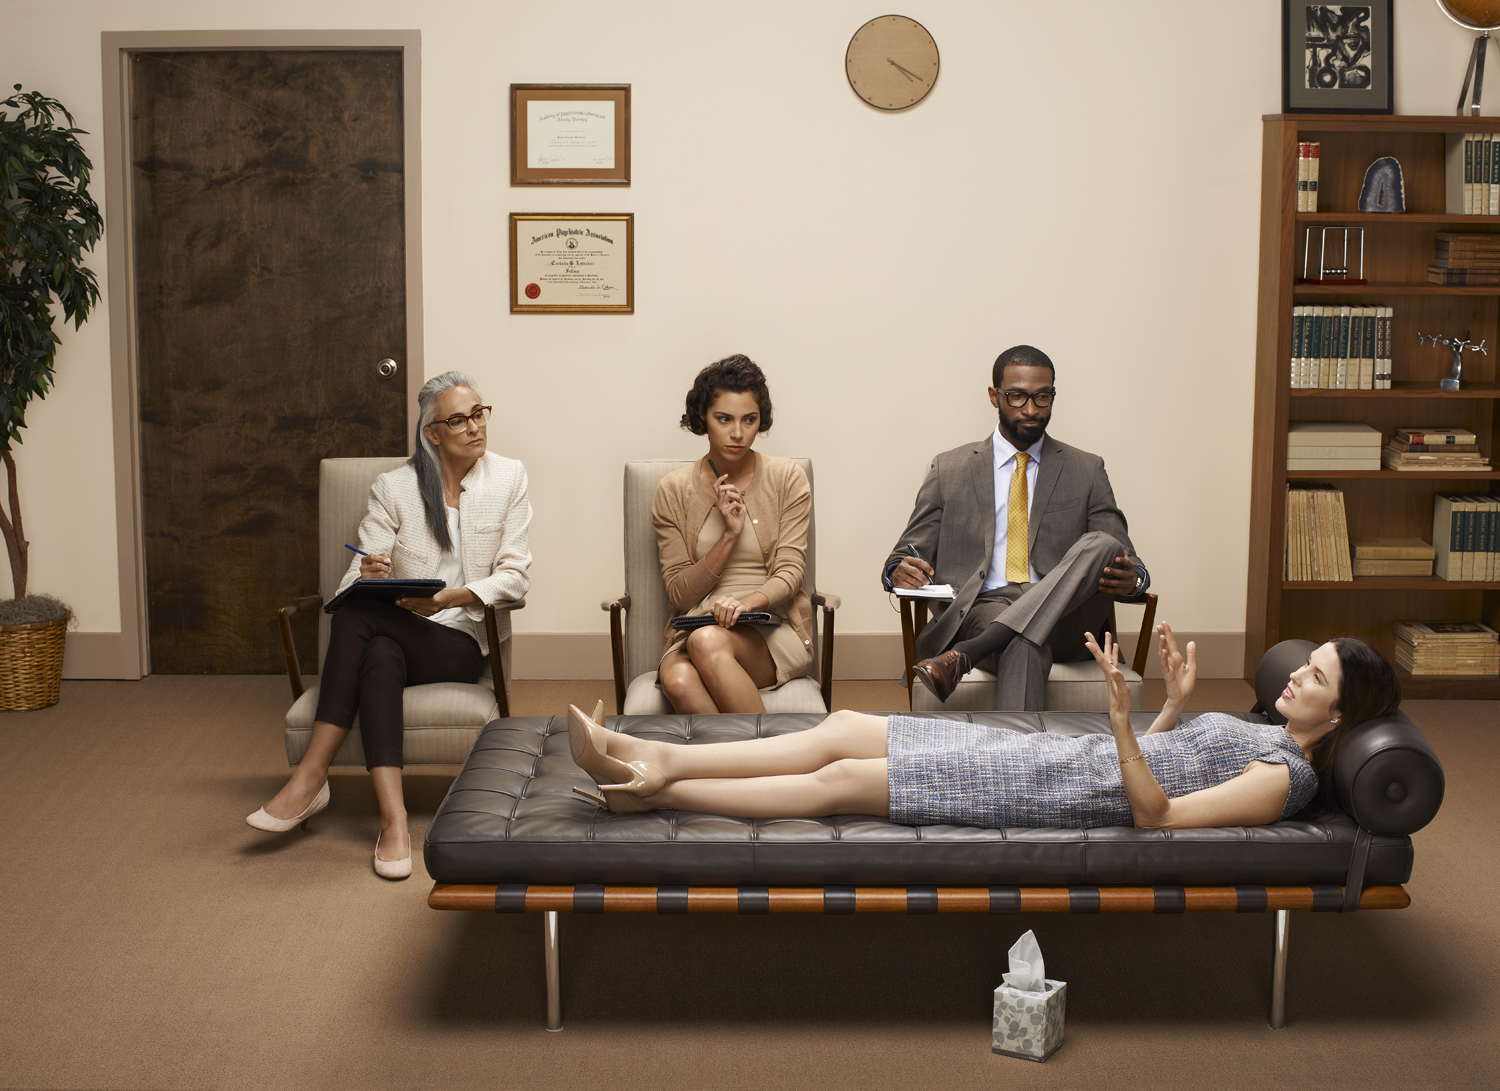
One hang-up was the chaise in the therapist office. We searched high and low for the right one, and it was touch and go all the way up until the 11th hour when my set builder located a tufted, brown leather flat-bed type. It just kind of showed up on shoot day with a collective sigh of relief.
What do you enjoy most about your creative process?
Another favorite part of my productions is prop making, and got the chance to create the dark cloud, pill bottle design, and the woven pigment print sculpture. Prop making is something I love to do. So much so, Iand am now offering my services to other photographers as a side business through my agent, Renee Rhyner.
Have you always built your own sets?
I don’t always build my own sets, but I do build them, yes. In this case, the timeline was too tight for me to create the props and set build, so I used my go-to set designer, Fabio Mascio and his team from his company, TractorVision. He and I have worked together for years, and have developed a symbiotic working relationship that clicks now that we know each other’s sensibilities and working styles.
Where or how did your love of prop making develop?
That is a good question and I never get asked it, surprisingly. I use to build things when I was a kid, whether a fort in the backyard with my neighbor, or some sort of functional gadget like a crossbow out of sticks or supplement my bicycle with whimsical handmade rockets or sidecar. And, I’m not talking about just throwing these handmade gadgets and gizmozs together, either. Whatever I did was detailed and elaborate, spending endless hours perfecting whatever I was making so it functioned and looked AWESOME.
How big was the team that produced this?
It was a pretty substantial production for an editorial job, and our collective teams were made up of 14+ people. The shoot took two days to complete, in a sound stage at Quixote Studios, and that extra time just helped the images in the long run. It made for very little compositing and post-production work, as we were able to cover everything needed in-camera.
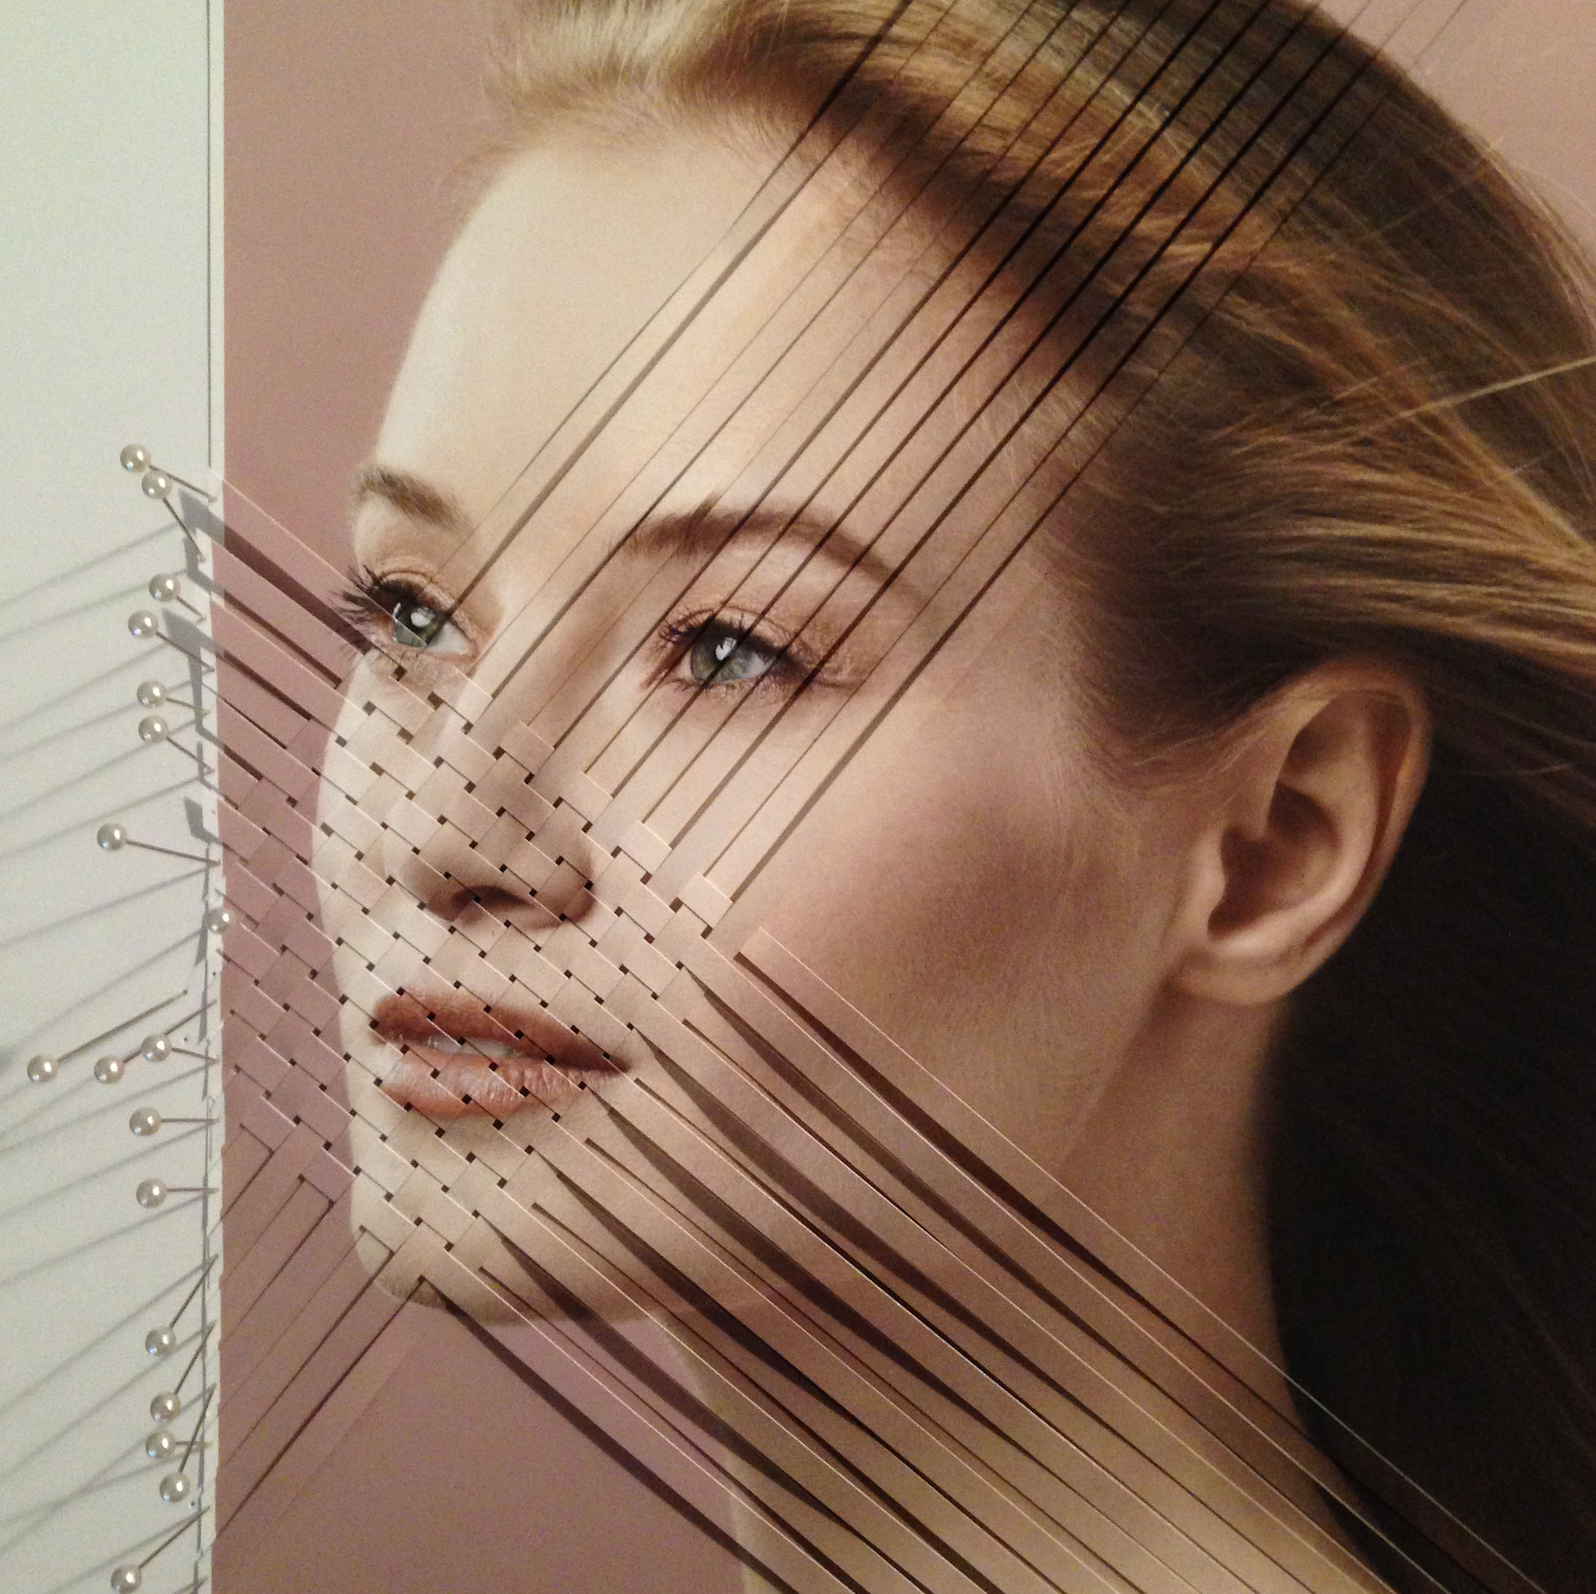
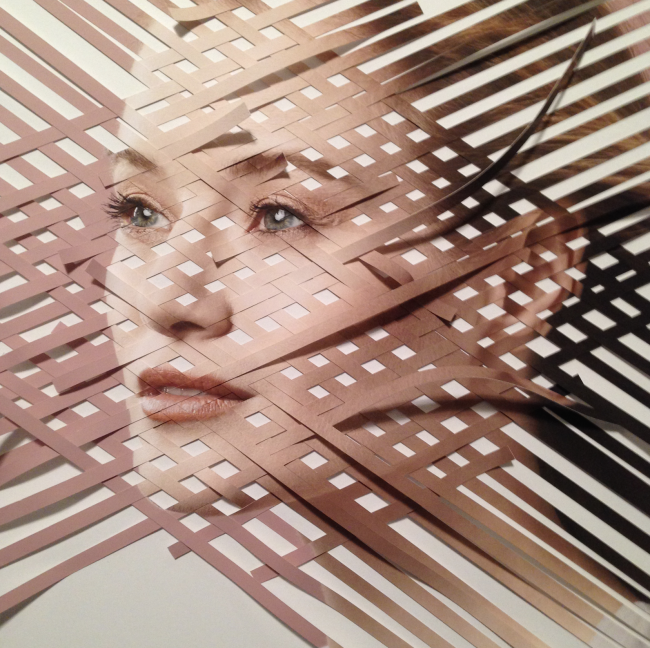
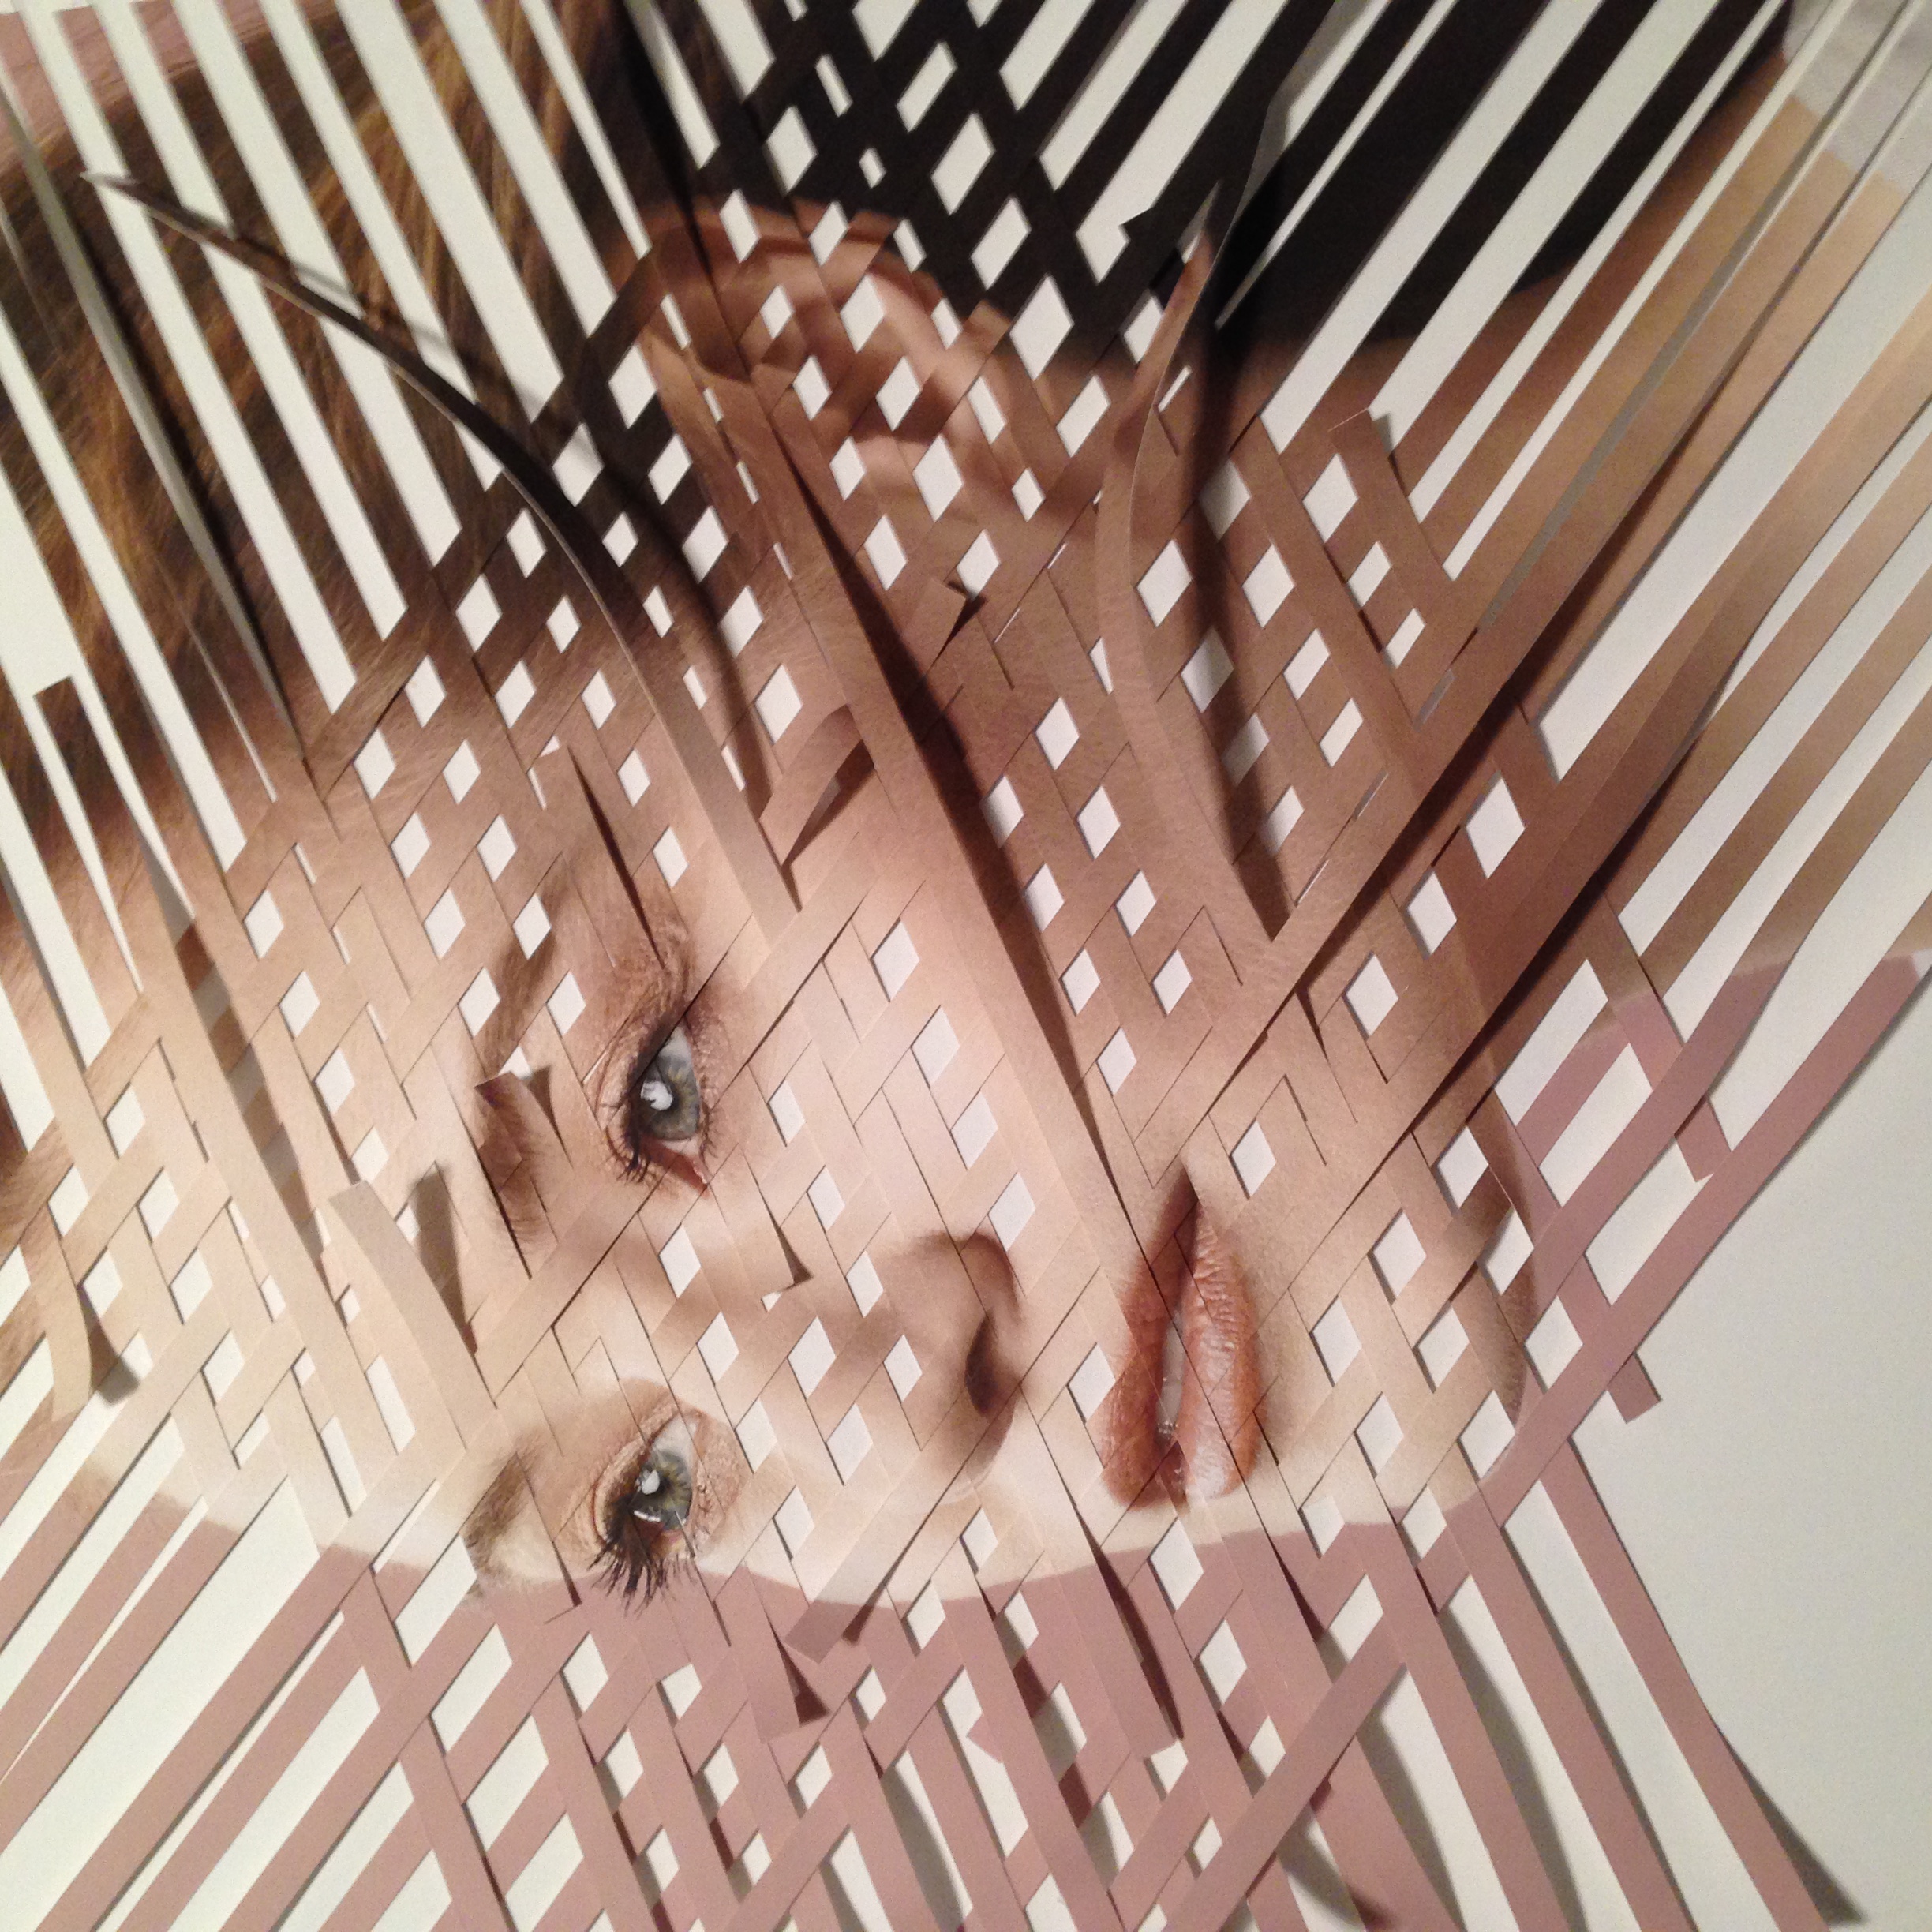
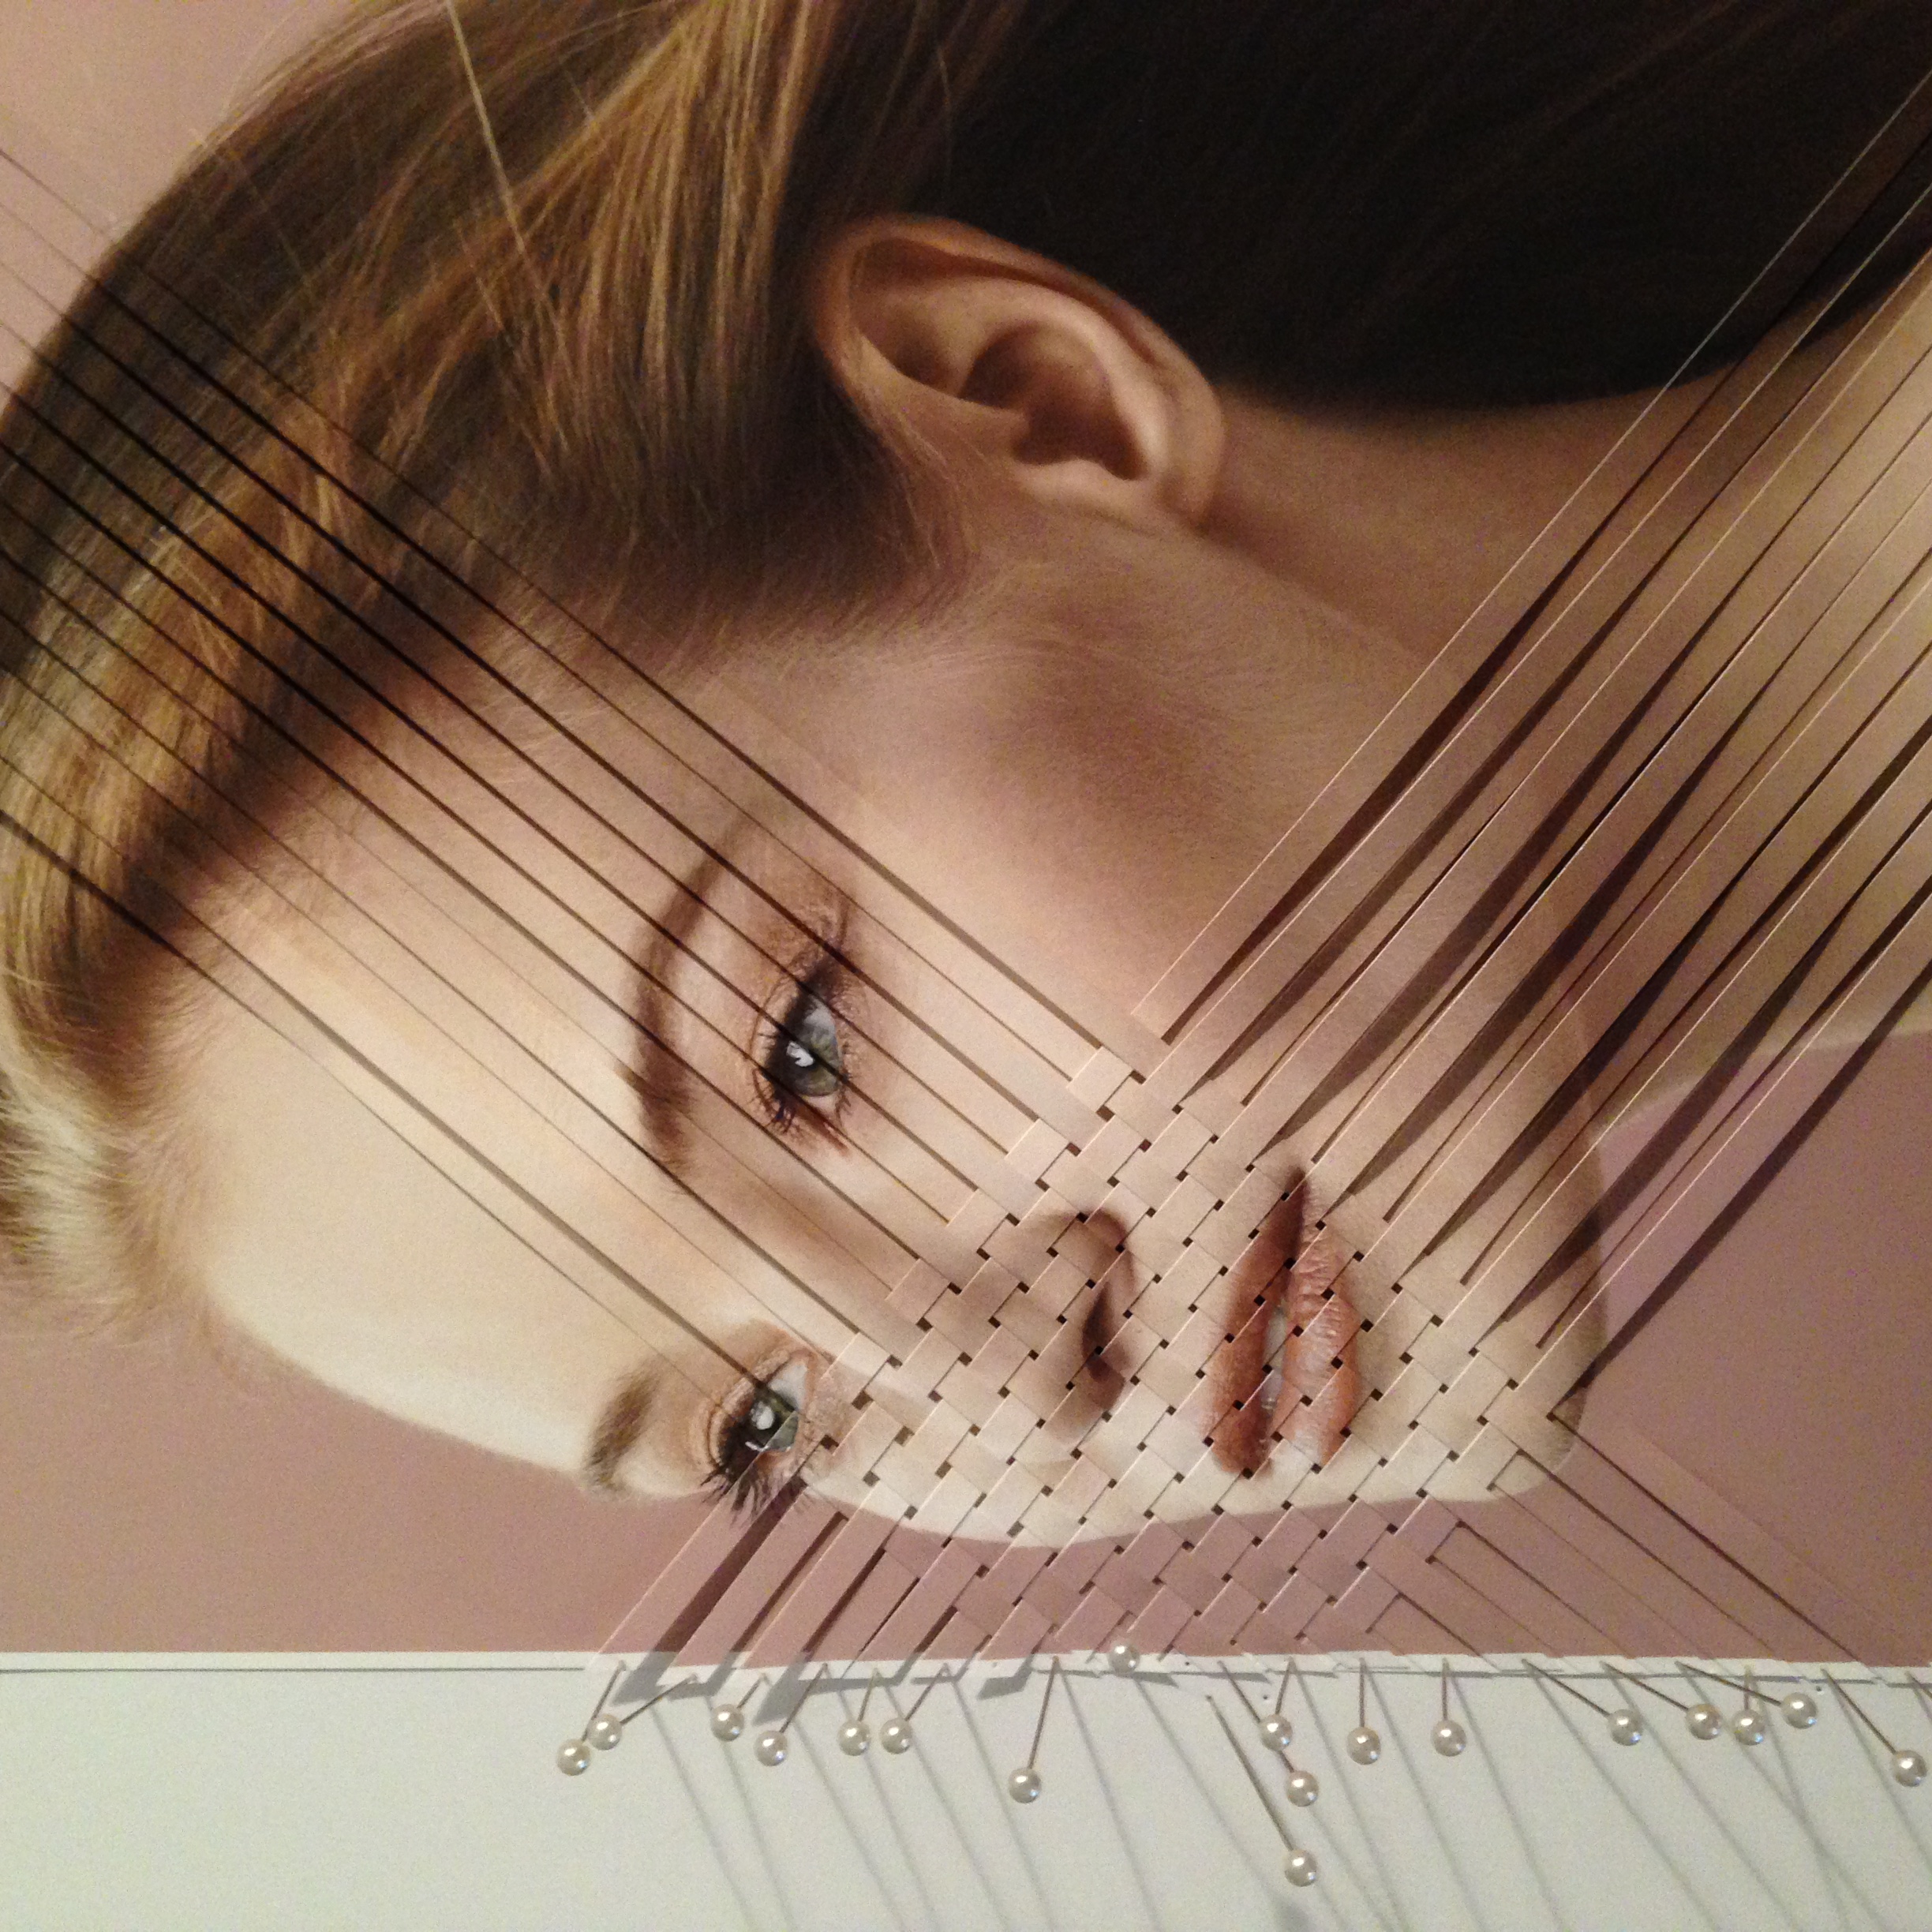
Love the woman unraveling, tell us about that.
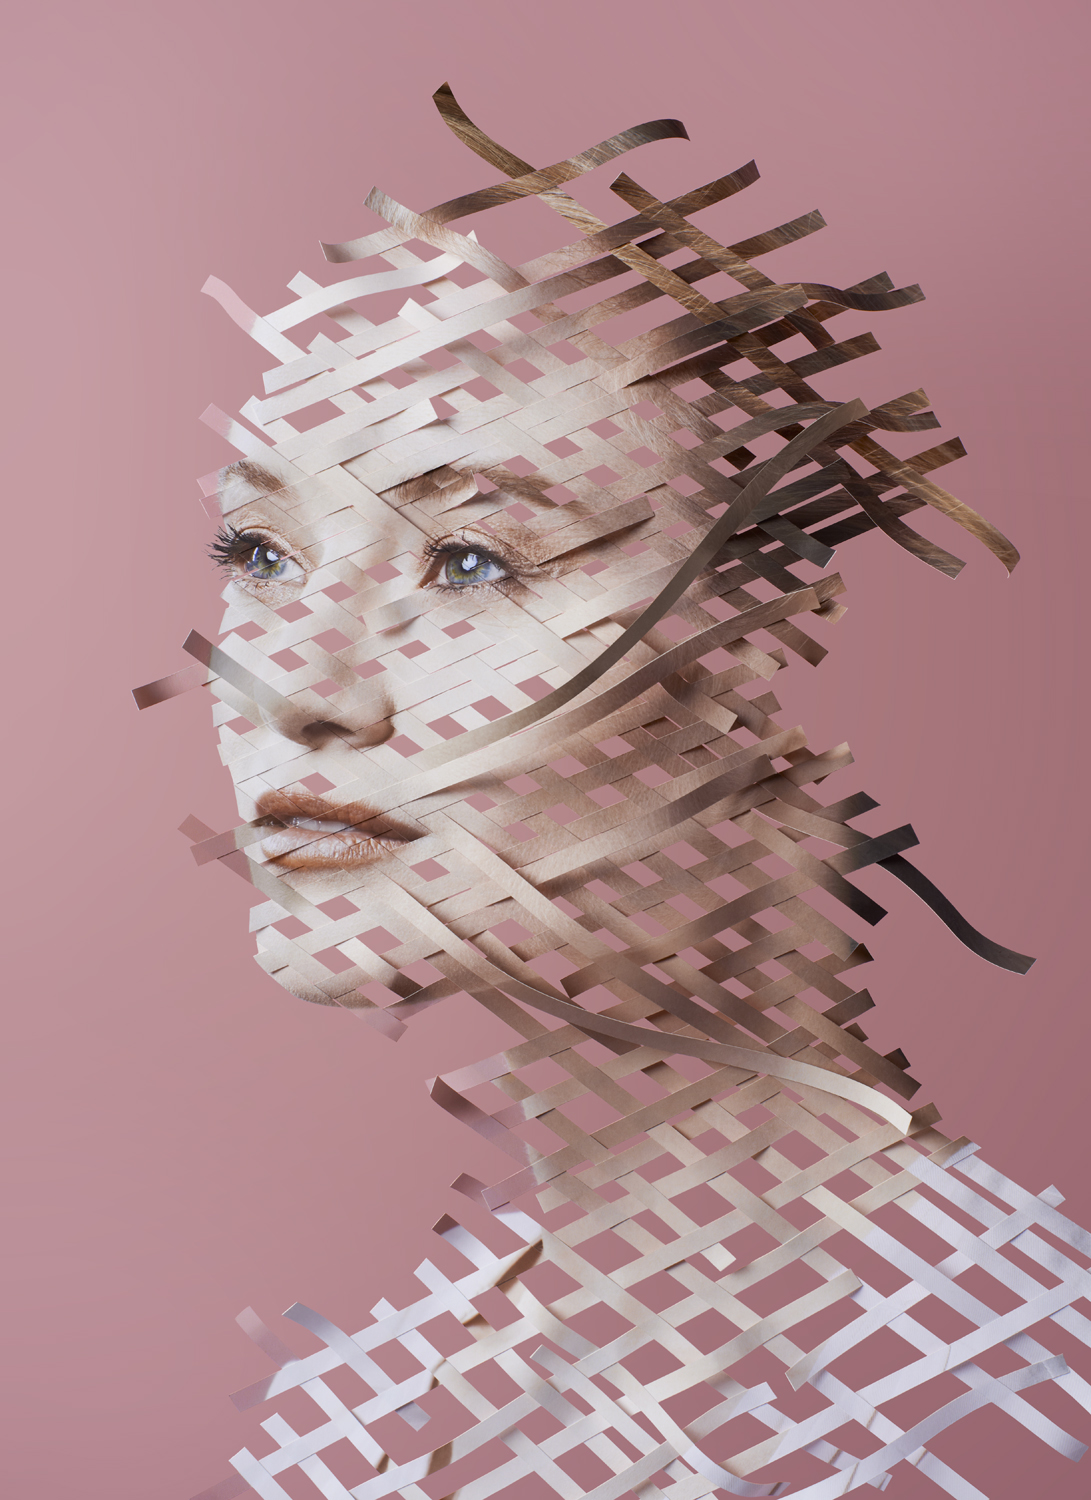
For the image of the woven woman unraveling, I made several, 13×19 pigment prints of the image that I had previously retouched and color corrected beforehand. The color of the print had to be right, and slightly color biased towards cool tones. That was because the final sculpture was going to be photographed using a Nikon D800, and that sensor renders skin tones that are biased towards warm hues. Once that was figured out, two prints were cut in half-inch strips, one in a direction 90 degrees opposite the other, in order for the weave to work as needed. I used another print as the base to construct the woven assembly on top of and in order to make sure the woman’s face didn’t distort when assembled together. Each strip was glued at intersecting sections, and I took liberties in forcing some dimension to the overall sculpture by bending some of the strips on the outer areas away from the face. The sculpture was then placed on a piece of transparent Plexiglass that itself was cut to the overall shape, and placed on another larger piece of Plexiglass that was suspended over the pink seamless background. The lighting on it was matched in direction and quality to the original set-up when I shot the model.
4 Comments
This is incredible.
Beautiful work! Well done Hugh!
Love this!
Nowadays seems a pure photographer is not enough.
I see many digital artists arise.
I think these look much more interesting than a regular photography.
Comments are closed for this article!